Build your first ute
1. Sign in
Section titled “1. Sign in”- Open the link the brand or your dealer gave you. The sign-in page says “Enter your access code”.
- Type the code in the Access code box, then select Unlock.
- The configurator opens with a ute already on the stage. Wait until “Loading your build” goes away. On a slow connection this can take about 15 seconds.
The left side is the 3D view, called the stage. The right side is the panel with the steps: Vehicle, Colour, Wheels & Tyres, Suspension, Protection, Roof, Back of Ute, Electrical & 12V and Summary. On a phone the stage is at the top and the panel is under it. Scroll down to reach the steps.
2. Choose your vehicle
Section titled “2. Choose your vehicle”- At the top of the panel, select the vehicle name, for example “Ford Ranger Super Duty”. A list opens, grouped by make, with a search box that says “Search make or model”.
- Type hilux in the search box. The list shrinks to the 2 Hilux models.
- Select Toyota Hilux, Double Cab SR5 2026. The list closes and the stage shows the Hilux.
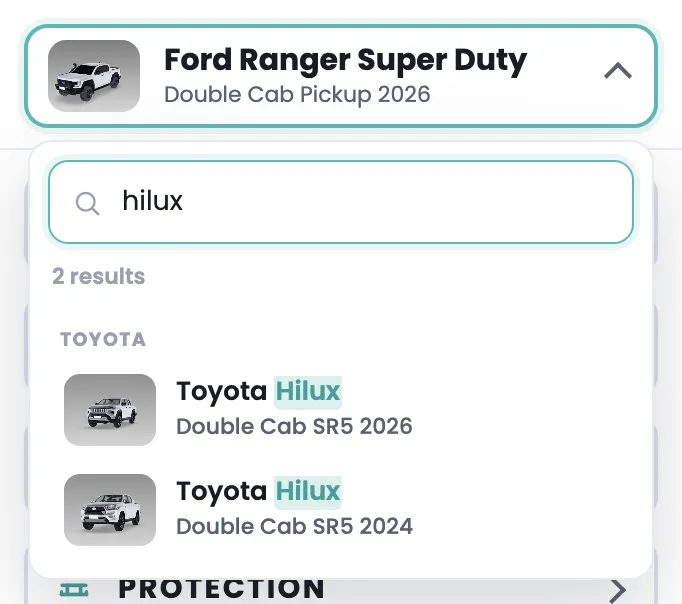
There are 16 utes to choose from, including Ranger, Hilux, D-Max, Triton, Navara, Amarok, Tasman, Shark 6, LandCruiser 79, F-150 and Ram 1500.
3. Pick a colour and finish
Section titled “3. Pick a colour and finish”- Select Colour. The step opens under the heading.
- Under Finish, choose Gloss or Matte.
- Under Factory colours, select a swatch. The Hilux changes colour at once. On a computer, hold your pointer on a swatch to see its name, for example “Stunning Silver”. A phone does not show the names.
- Want something else? Under Custom colours there are 12 more colours, then a rainbow square. The rainbow opens your device’s colour picker, so you can pick any colour.
4. Add a tray
Section titled “4. Add a tray”- Select Back of Ute. The list has Factory tub, Tray, Canopy, Glass-side canopy, Canopy load bars and Bed cover. On a phone, scroll down to see them all.
- Select Tray, then select T1 Tray 1800 Dual Cab. The stage turns to show the back of the ute with the tray on it.
- Look at the bottom of the panel. Build total now includes the tray’s price. On a computer, select Build details to see each item with its part number and lead time. A phone shows the build total only.
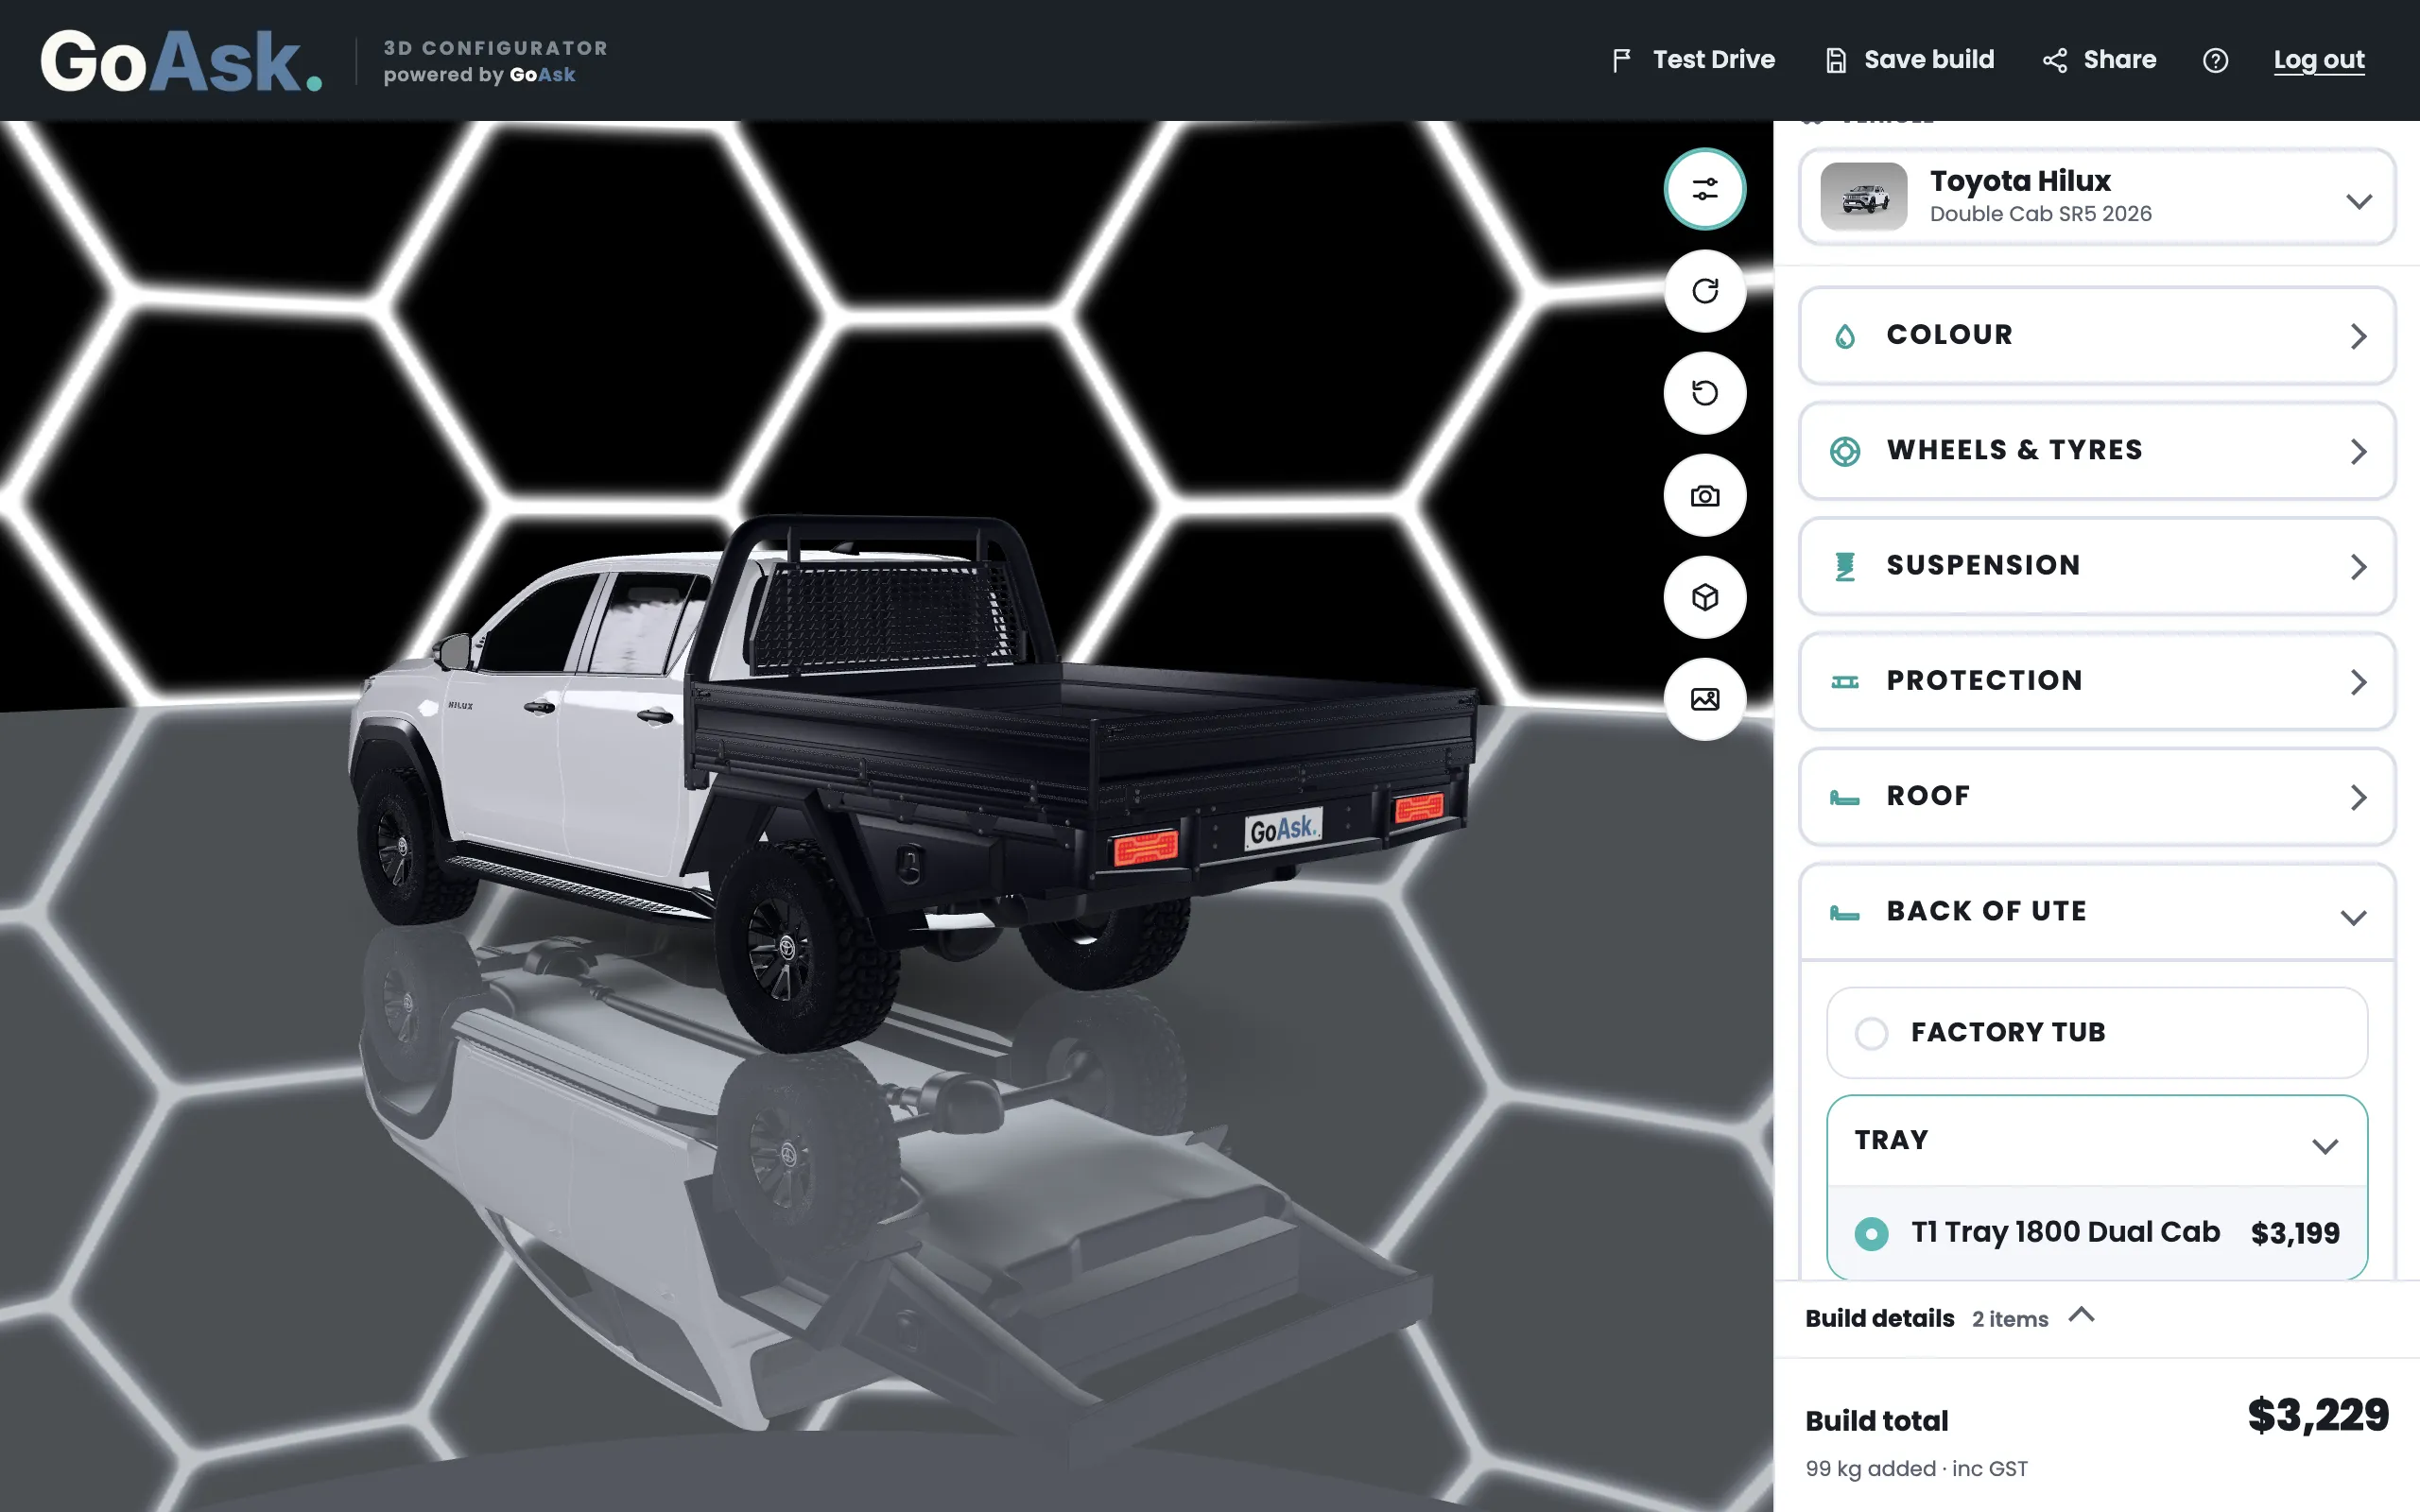
Choosing Factory tub again takes the tray off. A canopy replaces a tray, so you can have one or the other.
5. Put your rego on the plate
Section titled “5. Put your rego on the plate”- Scroll down to Summary. The first box is Number Plate, with “Your rego or name” in it.
- Type your rego, or a name. The plate on the ute shows it straight away.
6. Save your build
Section titled “6. Save your build”- Select Save build in the top bar. On a phone it is the second icon at the top, the one that looks like a floppy disk.
- “Build link copied” appears for a moment. The link is now on your clipboard.
- Paste the link into a note, a message or an email. Opening it brings back the same ute, colour, tray and plate.
The link is also in your browser’s address bar, so a bookmark works too.
What you can do next
Section titled “What you can do next”- Get a quote and see finance options
- Save and share your build
- Try the other steps: Wheels and Tyres, Suspension, Protection, Roof and Electrical and 12V all work the same way as Back of Ute.
If it doesn’t work
Section titled “If it doesn’t work”- The stage stays black or says the model did not load. Read The 3D view is blank or slow.
- A part is greyed out and says “Add a bull bar first” or similar. Some parts need another part fitted first. Driving lights need a bull bar. A roof light bar needs the roof rack. Canopy load bars need the glass-side canopy.
- The build total already shows $30 before you chose anything. That is the Canopy / Toolbox Fitting Kit, which the demo site includes in every build. It is not something you added.
- “Your session has ended” appears. The demo signs you out after a set time, 5 minutes by default. Sign in again with the same code. Your build is in the link, so nothing is lost.